How light meters see the world
When it comes to correctly exposing a scene, it helps for you to bear in mind one crucial difference between the way that most of us see the world and how your camera meter sees it. While you’re happily experiencing and photographing the world in all of its splendid Technicolor glory, what your meter is actually seeing—and attempting to record—is a visual story told in a palette of greys. Or more accurately, a world of one grey: a tone referred to in photography as 18-percent grey, or more commonly, middle grey.

Indeed, whether they are built into your camera or handheld, all meters are programmed to see and record the world around them as that single shade of middle grey. And in the world of photographic tonal values, that grey lies precisely halfway between absolute black and pure white. (And incidentally, the reason that it is 18-percent grey and not 50-percent grey is because the maths is based on an algorithmic scale, not a linear one.)
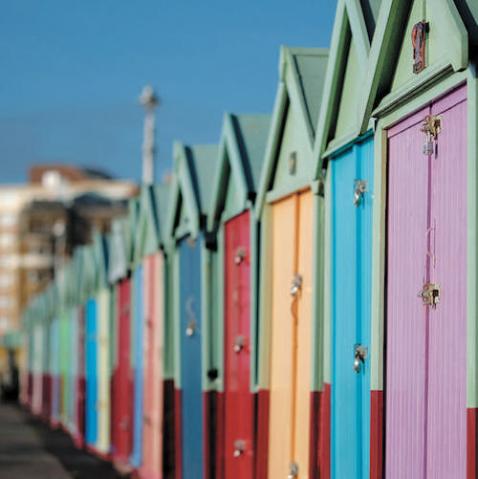
While this may seem like a rather limited point of view it is, in fact, the basis for all exposure measurement, and it’s a system that works with impressive precision and reliability. When you aim your camera at a red apple, for example, the meter sees a grey apple. When you meter from the blue sky, the meter sees a grey sky. And if you’re photographing a summer landscape of yellows, greens, blues, and reds what your meter wants to do is average all of those different tonalities into one big canvas of middle grey.

The reason that this system works so well is that whatever you aim your meter at, will be recorded as middle grey. If you are careful to meter a subject that happens to be middle grey then that subject will be exposed perfectly and all of the other tones will naturally fall into their proper place. Those tones that are lighter than middle grey will record lighter and those that are darker will record darker. A perfect system.

To start with, then, it is important to remember that whatever you meter will be recorded as a middle grey and so if you meter a subject that is middle-toned, the entire scene will be correctly recorded. Again, this is not to say, however, that all of the tones can be recorded because some may lay outside of your sensor’s ability to record them. The key to setting a perfect exposure then is to find a subject that provides that ideal middle-toned value to meter.
Michael Freeman’s Photo School Fundamentals is a complete course will help you to take exceptional photos and develop a deeper understanding of what makes a great photo work. Start by taking creative control of your images with exposure. Next, learn to read the light. Then take a step back and develop your photographic eye to recognise potential design and compositional choices. And finally, hone your digital development skills. By the end of this course you will understand the principles of photography, you’ll know what makes a successful photograph, and you’ll have the skills to take excellent photos yourself.
[one_whole boxed=”true”]
 Michael Freeman’s Photo School Fundamentals
£11.99 Download the PDF now!
Available as an e-book here on Ilex Instant first!
[button color=”Accent-Color” size=”small” url=”https://www.ilexinstant.com/product/photo-school-fundamentals/” text=”Digital Edition”]
[/one_whole]